
KBDFANS / THE KEYCAP BUYING GUIDE
Which PBTfans Keycaps Fit My Keyboard?
Start with your keyboard model and layout, then choose a PBTfans kit that covers its keys. Once the fit is confirmed, compare budget, material and design. This guide focuses on Cherry-profile options and uses Athena 75 as a worked example to show how those choices come together.

THE BUYING DECISION MAP
From your keyboard to the right set.
Check physical compatibility first, then kit coverage, preferences and how to buy. Follow a branch to its detailed checks.
 PBTfansEXPLORE THE KEYCAP COLLECTION ↗
Your exact keyboard model + PCB layout
-
A / PHYSICAL FITWill the keycaps fit?
- MX-compatible mount, key width and row profile
- Enter, Shift, Caps Lock and Backspace
- Spacebar widths, split keys and mounting positions
- Indicator window and LED position
-
B / KIT COVERAGEWhich kits do I need?
- Everything in the base kit? Select it alone.
- Keys missing? Add the matching Numpad, International, Spacebar or 40s kit.
- Need a light window? Check the LED Indicator kit.
-
C / YOUR PREFERENCESWhich set suits me?
- Budget: add up the cost of all required kits.
- Material: compare the actual set’s PBT or ABS finish.
- Profile: this guide focuses on Cherry.
- Design: choose colors and legends you like.
-
D / HOW TO BUYKeycaps or a full build?
- Own the keyboard? Choose PBTfans kits that cover your layout.
- Building a new one? Check models in the Configurator.
- Still unsure? Send Support your model, PCB and underside photo.
01 / LEARN THE BASICS
How to read your keyboard’s layout
Start with two references: your keyboard’s layout diagram and the kit layout image on the PBTfans product page, which shows the keycaps included in that kit. First confirm your switches have MX-style, cross-shaped stems. Then check the layout supported by your exact PCB and plate. A size label such as “75%” describes the keyboard’s form factor; it does not guarantee a particular key layout.
Find your Enter shape and key widths
A wide, rectangular Enter key usually indicates an ANSI layout; a tall, L-shaped Enter key indicates ISO. Then read the key sizes marked on the diagram. 1u is one standard key unit, based on the spacing of a letter key. A 1.75u key occupies 1.75 units in the layout. These are nominal layout sizes, not exact outer keycap dimensions. Read the labels instead of estimating from a product photo.
Check the keys that vary between layouts
Record the sizes of Enter, Caps Lock, left and right Shift, Backspace, the spacebar and bottom-row modifiers such as Ctrl, Alt, GUI (Windows/Command) and Fn. Also note navigation keys, a numpad, split keys, indicator windows and any regional legends you need. The illustrated special-key guide below explains what to look for.
Match key width, row profile and quantity
Open the kit layout image, including the extra keys below the main arrangement. Find each key on your checklist. Cherry profile is sculpted: keycaps have different heights and angles depending on their row. Match both the width and row profile of each sculpted key. Follow the set’s row labels, such as R1–R4; row numbering can vary between manufacturers. Check the quantity and legends (the printed characters), especially for navigation keys such as Home, End, PgUp and PgDn. Check spacebar mounting separately, as explained below.
 Horizontal rectangle
 Tall, L-shaped


02 / KNOW THE EXCEPTIONS
Special keys, explained before you buy
Size is only the first check. Some keys have a different shape, mounting position or lighting feature. Here is what the names in a layout diagram or kit layout image mean, and what to look for.
02.1 / SHAPE + SWITCH POSITION
Stepped Caps Lock
the same width can hide a different mount
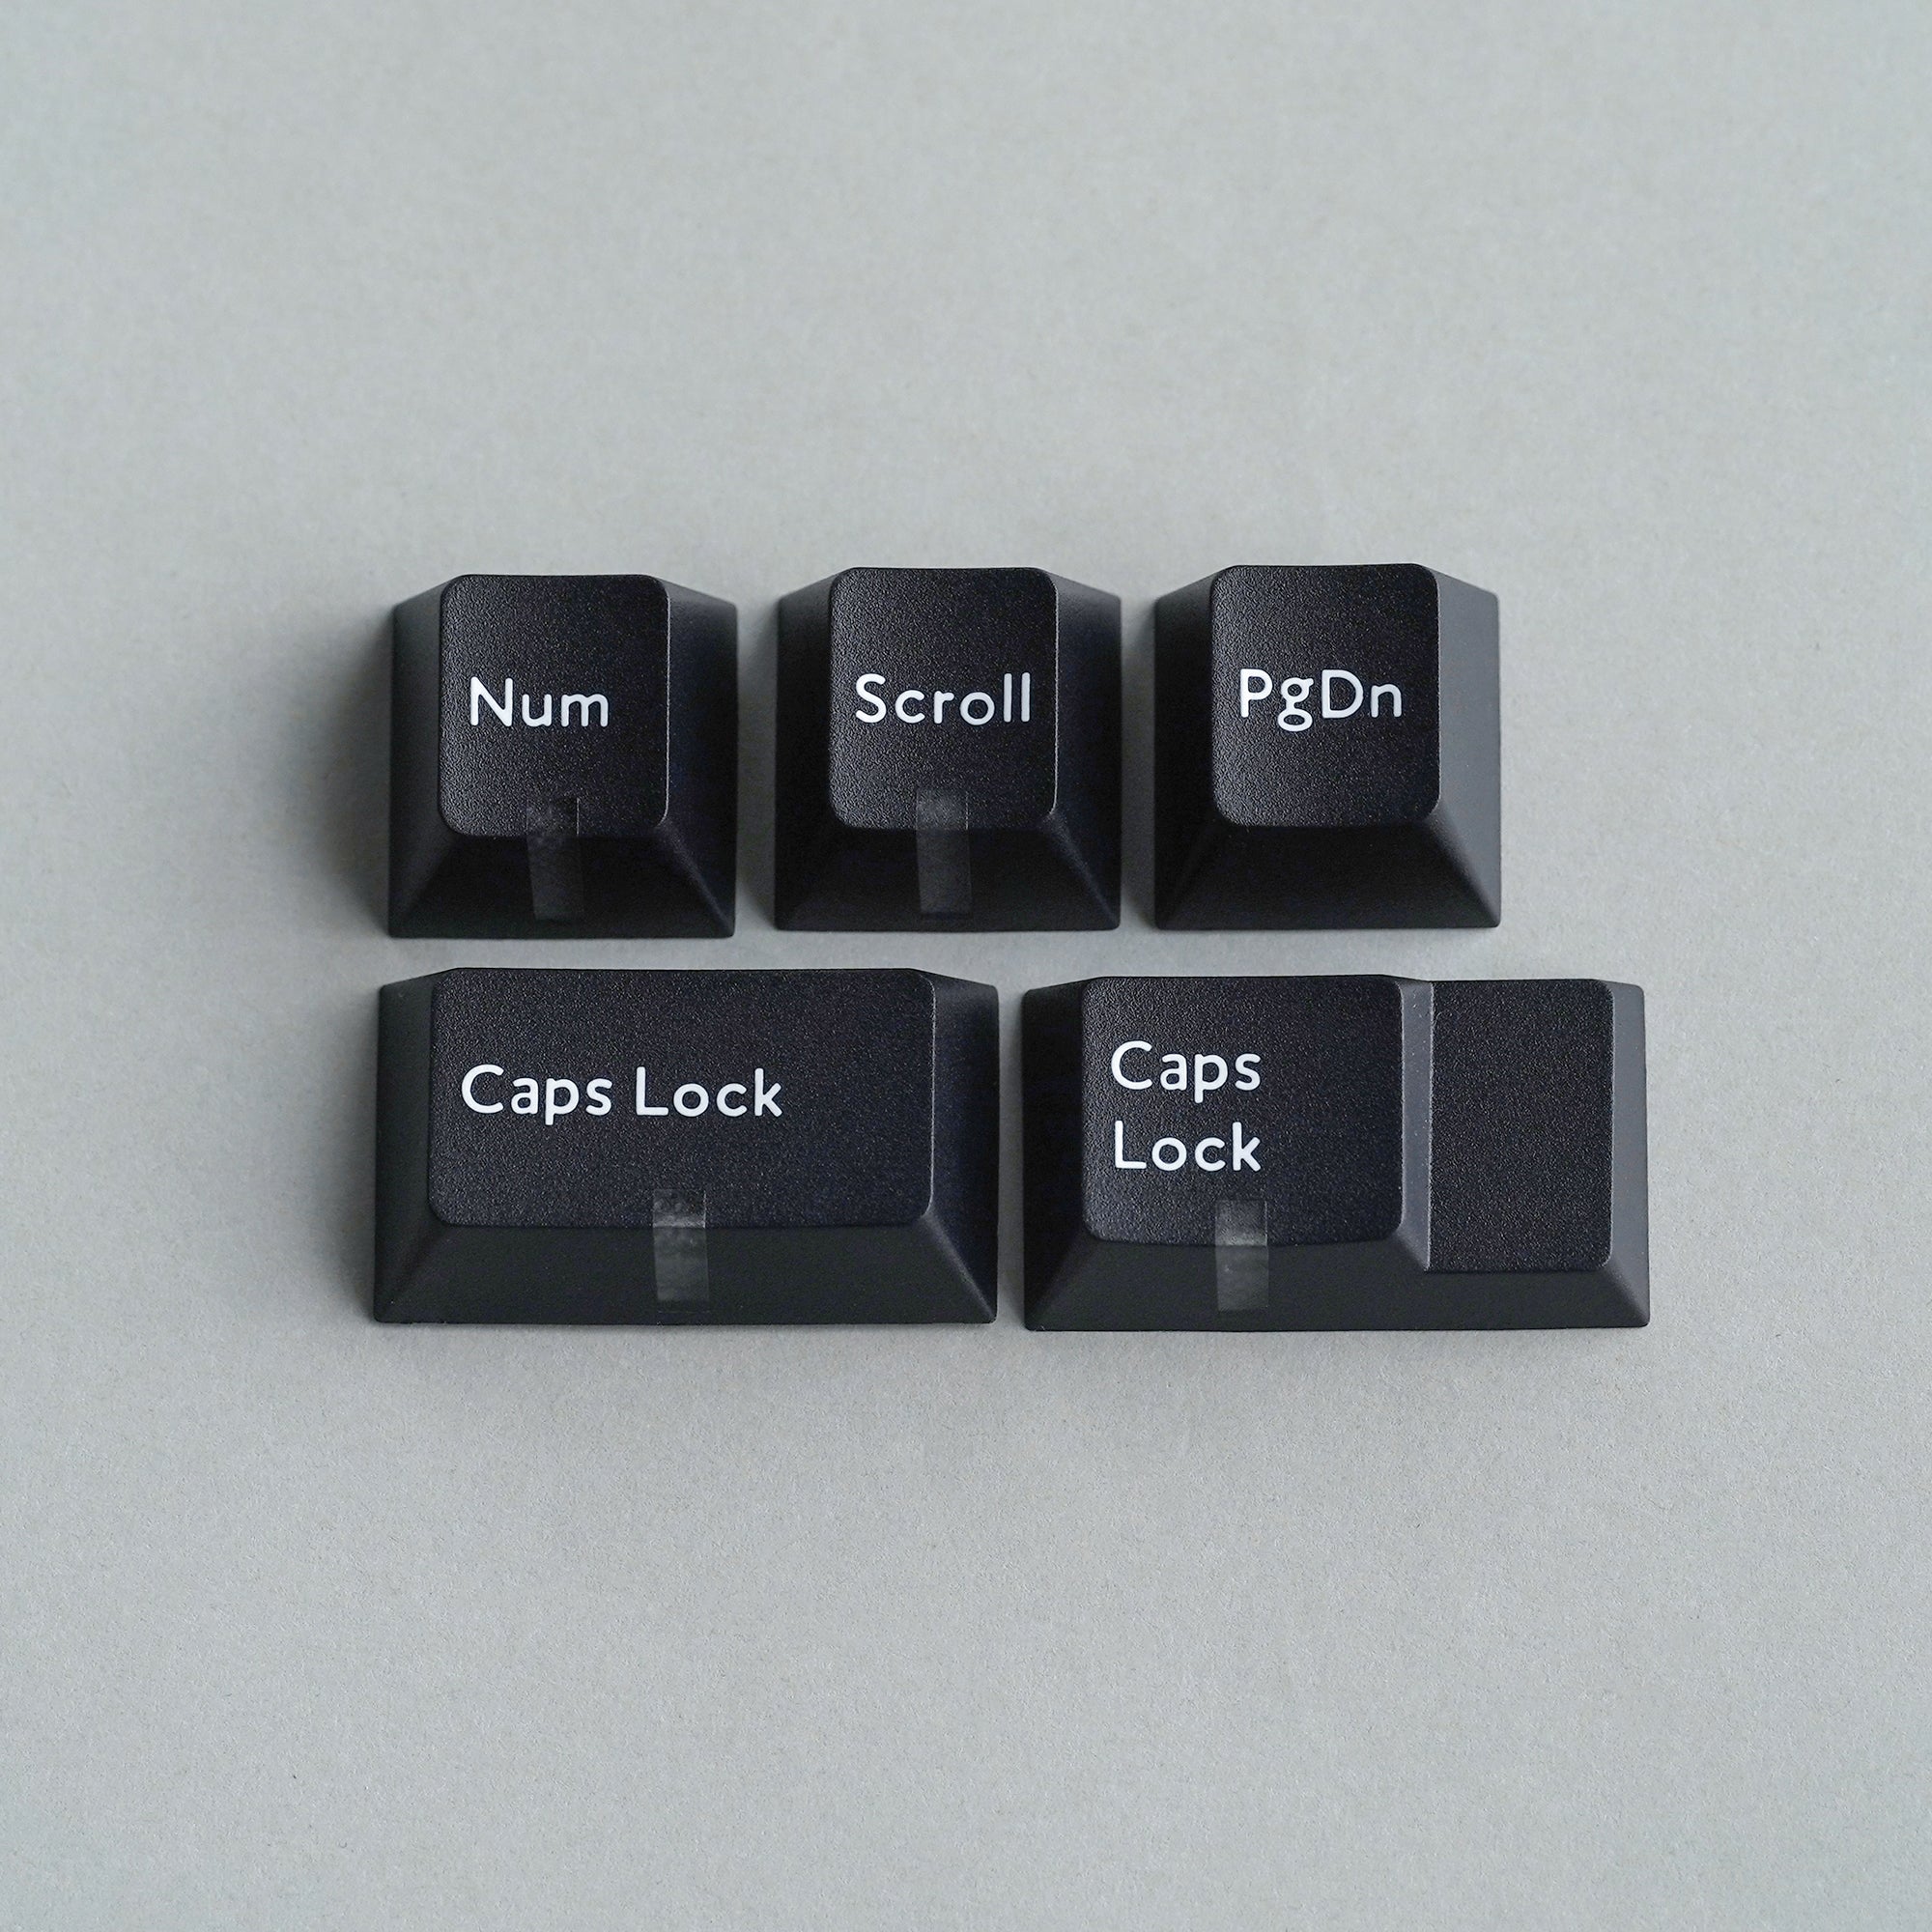
A regular Caps Lock has a continuous top surface. A stepped Caps Lock has a lowered section on one side. Both can be 1.75u wide, but many MX-compatible stepped keycaps use an off-center stem underneath. A regular cap and a stepped cap are therefore not automatically interchangeable.
 UNDERSIDE
 UNDERSIDE
What to check: your PCB and plate must support the switch position used by that cap. A fixed hot-swap socket cannot be moved by changing the keycap. On the Keystone Base kit image, look in the lower R3 group for the stepped Caps Lock option. Our Agar with PBTfans Song build page also offers a “Stepped Capslock” layout option.
02.2 / WIDTH + ROW
Split Backspace
one wide key becomes two separate keys
A common split Backspace layout replaces a 2u Backspace with two 1u keys. Their functions can be assigned separately—for example, Backspace and Backslash. The PCB and plate must support two switch positions, and the keycap kit must include two suitable 1u keys in the correct row profile.
 Backspace · 2u
 1u
1u
1u
1u
What to check: check the position and row profile required by your chosen layout before looking for a Backspace keycap. An HHKB-style layout may place Backspace on a different row from a conventional split Backspace layout. The Agar / Song build explicitly lists Split Backspace (1u + 1u). Remapping changes what the keys do; it does not change their physical sizes.
02.3 / WINDOW + LED DIRECTION
LED indicator keycaps
a window for a status light
An LED indicator keycap has a translucent window or insert so you can see a status light, such as Caps Lock, through the cap. A normal opaque keycap may cover that light. An indicator window is a separate feature from RGB lighting around the keys or a full set of shine-through legends.
 South-facing LED · toward the typist
What to check: the window’s alignment with the LED, LED orientation and firmware support for the status you want. The PBTfans WOB page offers Text LED Indicator and Icon LED Indicator kits, including regular and stepped Caps Lock options. Its specifications require south-facing LEDs, on the side toward the typist. Select the indicator kit separately if needed; installing the cap does not add an LED or configure its behavior.
02.4 / WIDTH + BOTTOM ROW
6.25u versus 7u spacebars
match the whole bottom row
A 7u spacebar is wider than a 6.25u one. It needs the matching switch and stabilizer positions, with room for the modifiers beside it. You cannot replace a 6.25u bar with a 7u bar while leaving a fixed bottom row unchanged.

What to check: the exact bottom-row layout, including modifier widths and stabilizer mount spacing. WKL (winkeyless) and Tsangan are useful layout terms, but neither label replaces a diagram of the specific keyboard. Keystone’s base kit includes both 6.25u and 7u spacebars; do not buy an extra Spacebar kit just because your board uses 7u. Other sets may package that bar separately.
02.5 / WIDTH + QUANTITY
Split spacebars
record every width and how many you need
Split spacebars replace one long spacebar with two or more separately mounted keys. These keys can all send Space or be assigned different functions. There is no universal split size: 3u + 3u is one arrangement, while other layouts can call for different widths.
 6u example
 3u
3u
3u
3u
What to check: each spacebar’s width, quantity, stem position, stabilizer mounts and top surface. Short spacebars are often convex (curved outward); a same-width Shift keycap usually has a concave (recessed) top. Check the intended surface shape as well as physical compatibility. For a 3u + 3u layout, you need two matching 3u bars. Keystone’s base kit image shows a pair of 3u bars, but the rest of any proposed keyboard layout still needs checking.
02.6 / STEM + STABILIZERS
Centered versus off-center stems
turn the keycap over
Here, stem position means where the keycap’s MX-mount stem sits underneath it: the mounting post with a cross-shaped opening that fits onto the switch stem. A centered stem sits halfway across the keycap’s width; an off-center stem is shifted to one side. It does not describe where the printed legend sits. Two caps with the same width can have different stem positions and may not fit the same switch layout.


What to check: compare the existing cap’s underside or the manufacturer’s mounting diagram with the replacement. This matters for stepped Caps Lock and some 6u spacebars. Check both the keycap stem position and stabilizer mount spacing; a “6u” label alone is insufficient. A top-down kit layout image may not reveal this, so ask KBDfans Support for confirmation with your keyboard model, PCB and an underside photo.
Reference renders use Santiago Castelo’s open-source Cherry-profile models (MIT), rather than official Cherry or PBTfans production CAD. They illustrate keycap shapes and mounting positions; confirm compatibility using the specific product’s layout and specifications.
03 / PUT IT INTO PRACTICE
Example: choosing keycaps for Athena 75
The Athena 75 is a 75% keyboard with a function row and dedicated arrow keys. The kits below cover its standard ANSI layout, including the shorter 1.75u right Shift. They are examples from our PBTfans collection; more sets may also fit.
A / YOUR KEYBOARD’S PCB
For this diagram, record right Shift 1.75u, Enter 2.25u, spacebar 6.25u and bottom-row modifiers 1.25u. Here is how to check two of those against PBTfans Keystone Base kit:
Right Shift · 1.75u
Shift · 1.75u · R4 row
Spacebar · 6.25u
Spacebar · 6.25u
Then check Enter, the remaining modifiers and navigation keys. Keystone’s base kit covers this standard Athena 75 layout.
B / THE SET’S BASE KIT

| PBTfans set | Kit to select | Material | Kit price |
|---|---|---|---|
| PBTfans Keystone | Base | PBT | US$65 |
| PBTfans no signal R3 | Base | PBT | US$68 |
| PBTfans WOB | Base | PBT | US$75 |
| PBTfans Spark R3 | Base kit | PBT | US$75 |
| PBTfans Fairy R2 | Base | ABS | US$75 |
| PBTfans Thermal | Base | ABS | US$99 |
Listed kit prices checked October 8, 2026, in USD, before discounts, shipping and tax. Each product link selects the kit shown. Check current availability on that page.
We offer Athena 75 ready-to-use builds with Fairy R2, Spark R3, no signal R3, WOB and Thermal. Keystone’s base kit also supplies the keys in the standard layout. These builds are useful references for seeing the sets on the keyboard.
04 / BUILD YOUR CART
Which kit should you select?
Start with the base kit, usually labeled “Base” or “Base Kit” on the product page. Compare its kit layout image with your checklist. Kit coverage means the key sizes, row profiles and quantities included; the kit name alone does not confirm compatibility.
Compare material, total price and color.
Add the required add-on kit, or choose a set with the coverage you need.
- Numpad: for a standalone numpad or a keyboard with a numpad, such as full-size, 96% or 1800 layouts, if the base kit does not include those keys.
- International / ISO: for the ISO Enter, additional ISO keys and regional legends your layout needs, if the base kit does not already include them.
- Spacebar / 40s: for alternate spacebar sizes, split spacebars or the smaller modifiers used by some compact layouts. Check key widths, row profiles, quantities and mounts.
- LED Indicator: for keycaps with status-light windows. Match the window to your keyboard’s LED position and check regular versus stepped Caps Lock compatibility.
These add-on kits usually supplement a base kit. Spacebar kits supply alternate spacebars; novelty kits supply decorative legends. Neither typically covers a complete keyboard on its own. Compare the total cost of all kits required for your layout.
05 / CHOOSE YOUR PREFERENCES
Narrow it down by budget and material
The example shortlist spans three budget levels. For your keyboard, first confirm fit, then compare the options within your budget.
KIT BUDGET
US$65–70Keystone or no signal R3 in PBT.
KIT BUDGET
Around US$75WOB and Spark R3 in PBT, or Fairy R2 in ABS.
KIT BUDGET
Around US$100Thermal in ABS with a dark translucent design.
PBTfans is the brand name: individual sets can use PBT or ABS. Fairy R2 and Thermal use ABS. PBT often feels more textured and usually resists surface shine longer; ABS surfaces can become glossy with use. The particular set’s finish still matters. Our Materials & Sound Guide explains the differences. All six options here share Cherry profile.
Compare the total cost of the required kits. A low “from” price may apply to a Spacebar, Numpad or accent kit rather than the base kit. A numpad, alternate spacebar size or regional layout may require an add-on kit. For the standard Athena 75 layout above, each listed kit provides the required coverage.
06 / YOUR NEXT STEP
Upgrading an existing keyboard or building a new one?
Explore the ConfiguratorBrowse PBTfans keycapsAlready own a keyboard? Browse the PBTfans collection, confirm the kit covers your layout and buy the keycaps you need. Athena 75 owners using the standard layout can start with the example table above.
Planning a complete keyboard? Our Keyboard Configurator brings the choices together around a supported keyboard. Open a model, work through its component steps, select the Keycap step and review your configuration and total price. It helps you see your choices together as you build.
We are adding more models to the Configurator; check the current model list. At the time of this guide’s product check, Athena 75 was not listed. Its ready-to-use builds above provide another way to choose a complete keyboard.
07 / BEFORE YOU ORDER
Make one final compatibility check
ISO Enter, a 7u spacebar and split keys require both keyboard layout support and the corresponding keycaps. Check your PCB layout, plate compatibility and kit coverage together. For the Athena 75 example, the plate designed for plate-mount stabilizers does not support ISO Enter, a 7u spacebar, split Backspace or split left Shift. Need help? Send KBDfans Support your keyboard model, PCB option and proposed keycap kit.